


A roof replacement follows seven main steps: inspection and estimate, choosing materials and pulling permits, site prep, tearing off the old roof, repairing the deck, installing the new roof, and final cleanup. Most homes are finished in one to three days.
Knowing what happens at each stage takes the stress out of the project. You will know what the crew is doing, what you need to do, and roughly how long it takes.
This guide walks through the whole process in plain terms. If you are still deciding whether you need a new roof at all, our guide on the signs you need a new roof is a good first stop.
Table of Contents
ToggleThe Roof Replacement Process at a Glance
Every roof replacement follows the same basic path. Here are the seven steps from first call to final walkthrough.
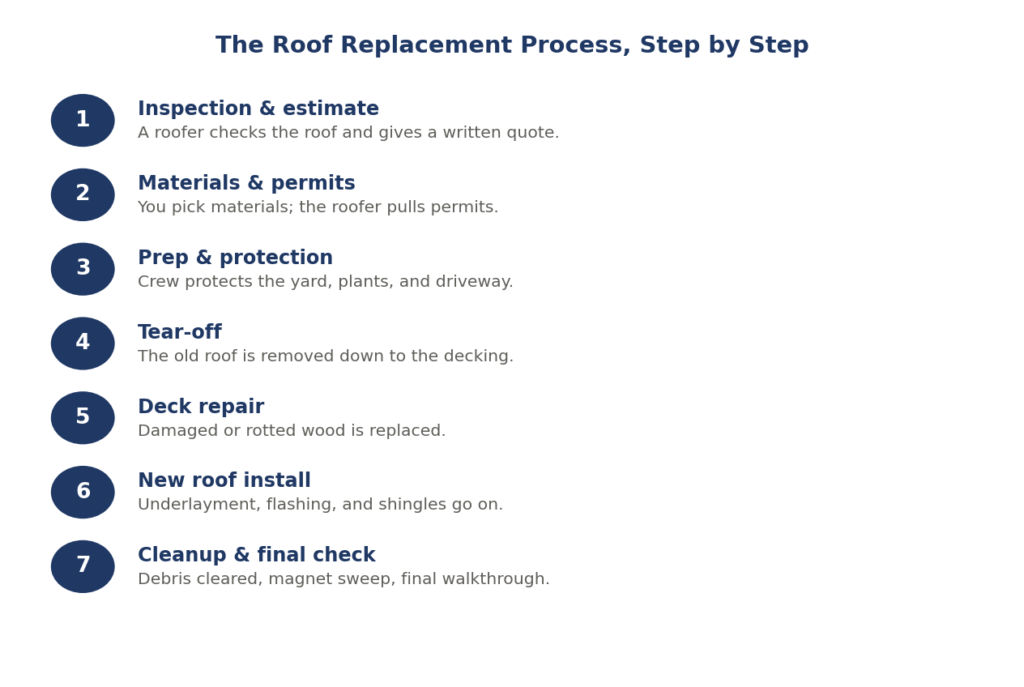
The order rarely changes. What varies is the time each step takes, which depends on your roof size, the weather, and how much deck repair is needed.
Understanding the flow helps you spot a good roofer from a rushed one. A crew that skips the inspection or glosses over the deck is cutting corners you will pay for later.
Step 1: Inspection and Estimate
Everything starts with a proper inspection. A roofer checks the shingles, flashing, decking, and attic to judge the roof’s condition and measure the job.
You then get a written estimate that lists materials, labor, and any extras. A good quote is clear and itemized, with no vague lump sums.
Ask questions at this stage while it costs nothing. A good roofer is happy to explain what each line means and why it is there. If a quote feels vague or rushed, that tells you something about how the work will go.
A thorough inspection also looks inside the attic, not just on top. Water stains, daylight through the boards, and damp insulation often reveal problems the surface hides.
This is also the moment to confirm you need a full replacement rather than a repair. Our guide on roof repair vs replacement helps you weigh the two before you commit.
Step 2: Choosing Materials and Permits
Next you choose your roofing material, color, and any upgrades like better underlayment or ventilation. Your roofer helps match the choice to your home and budget.
Take your time here. The material sets how long the roof lasts and how it looks, so it is worth comparing options rather than defaulting to the cheapest. Your roofer can show you samples and explain the trade-offs.
The roofer also handles the paperwork. Most roof replacements in Illinois need a permit, and a professional crew pulls it for you.
Curious about the permit side? Our guide on roof replacement permits in Illinois explains what is required. This is also when you settle on how to pay for the roof, whether in cash or through financing.
Step 3: Preparing Your Home and Yard
On install day, the crew protects your property before any work begins. They cover plants, move loose items, and set up tarps to catch debris.
There are a few things you can do to help the day run smoothly.
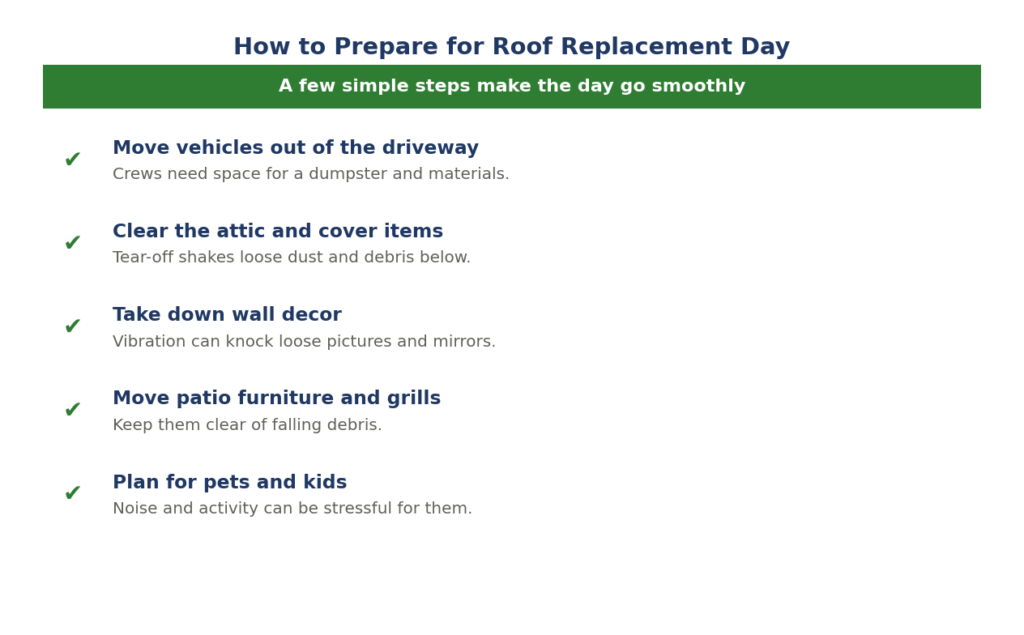
Moving your cars, clearing the attic, and taking down wall decor all make the job easier and protect your belongings from dust and vibration.
Step 4: Tearing Off the Old Roof
With the site protected, the crew removes the old roof down to the wooden deck. This is the noisiest, busiest part of the day.
Stripping the roof completely lets the crew see the deck and start fresh. Some roofers offer to roof over the old layer, but a full tear-off is the better long-term choice because it reveals hidden damage.
Expect a dumpster in the driveway and a busy crew for a few hours. The old shingles, nails, and underlayment all come off, and the crew clears them as they go to keep the site safe.
Step 5: Repairing the Roof Deck
Once the old roof is off, the deck is exposed and inspected. Any wood that is soft, rotted, or water-damaged is replaced before the new roof goes on.
A solid deck is the base for everything above it. Our guide on roof decking and when it needs replacing explains why this step matters so much for the life of your new roof.
Step 6: Installing the New Roof
Now the new roof goes on, layer by layer. The crew lays underlayment first, then flashing around edges and penetrations, and finally the shingles or panels.
Each layer has a job. Underlayment adds a water barrier, flashing seals the weak points, and the top layer takes the weather.
Ventilation is fitted at this stage too. Ridge vents or other outlets let hot, moist air escape the attic, which protects the new roof from the inside and helps it reach its full lifespan.
Two of those layers are worth understanding: our guides on roof underlayment and roof flashing explain how they keep water out for decades.
Step 7: Cleanup and Final Inspection
A good roofer leaves your property cleaner than they found it. The crew clears all debris, runs a magnet over the yard to collect stray nails, and hauls away the old material.
Then comes the final walkthrough. The roofer checks the finished job, confirms everything meets code, and reviews the work with you.
Do not skip this step. Walk the property with the roofer, look at the finished roof from the ground, and raise anything that looks off before you make the final payment.
Before the crew leaves, make sure you get your warranty paperwork. Our guide on roofing warranties explains the difference between material and workmanship cover, so you know what you are protected against.
How Do You Choose the Right Roofer?
The crew matters as much as the material. A great roof installed badly will still fail early, so who you hire is the most important decision in the whole process.
Look for a licensed, insured, local roofer with a track record you can check. Ask for references, confirm the warranty, and make sure the quote is written and itemized.
Be cautious of anyone who pressures you to sign on the spot or asks for full payment upfront. A trustworthy roofer explains the process, answers your questions, and gives you time to decide.
How Long Does the Whole Process Take?
From first inspection to a finished roof, most projects run one to three weeks, though the actual install is usually one to three days. Scheduling, material delivery, and weather account for most of the gap.
The install itself is quick for an average home. Our guide on how long a roof installation really takes breaks down the timeline in detail.
Frequently Asked Questions
How long does a roof replacement take?
The install usually takes one to three days for an average home. The whole process, including scheduling and materials, often runs one to three weeks.
Do I need to leave my home during the work?
No. You can stay home during a roof replacement. It is noisy, so some people plan to be out during the loudest tear-off hours, but it is not required.
What happens if it rains during the job?
Work pauses and the crew covers the exposed roof to keep water out. A good roofer watches the forecast and does not start a tear-off they cannot finish or protect.
Will a roof replacement damage my landscaping?
It should not. A careful crew covers plants and beds and cleans up fully afterward. Ask how they protect your property before you hire.
Do I need a permit for a roof replacement?
In most Illinois towns, yes. Your roofer normally pulls it for you. Our full roof replacement service in Illinois handles permits and inspections as part of the job.